Create an Azure Active Directory (AD) application and assign the required permissions to it to allow the applications to access or modify the resources. Follow this approach to run the application using your credentials for these reasons:
- You can assign permissions to the app identity that are different than your own permissions. These permissions are restricted to the actions of the app.
- You do not have to change the app's credentials if your responsibilities change.
Pre-requisites
Ensure you have sufficient permission to register an application with your AzureActive Directory (AD) tenant and assign the application to a role in your Azure subscription.
These are the pre-requisites for creating an Azure Active Directory Application:
- Permissions to register an application with Azure AD tenant.
- Permissions to assign role to an application in Azure subscription.
Checking Azure Active Directory Permissions
Follow these steps to check Azure Active Directory permissions:
- Log in to Azure portal.
- Select Azure Active Directory.
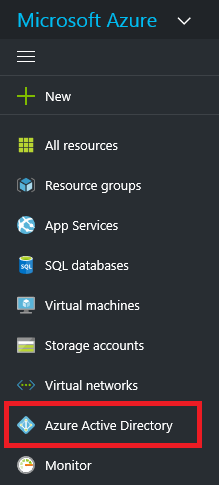
Select User Setting in Azure Active Directory - PREVIEW window.
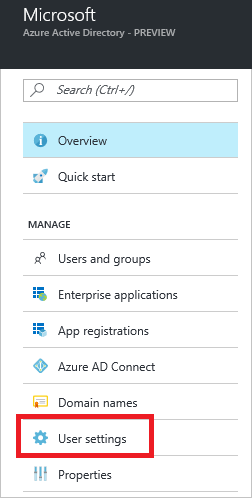
- Check the App registrations setting.
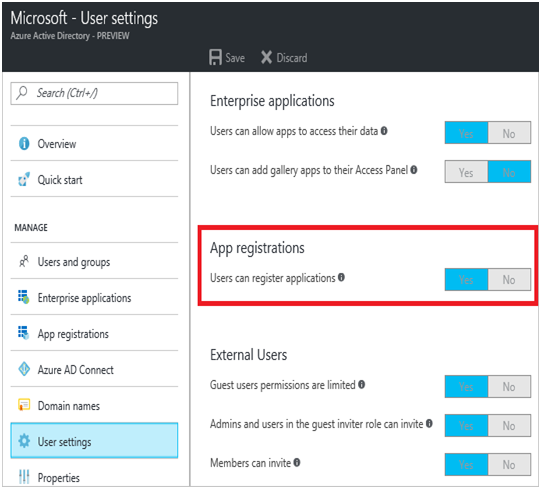
In App registrations setting, if Users can register applications is set to Yes, then any user in the Azure AD tenant can register an app. Proceed to Check Azure subscription permissions.
In App registrations setting, if Users can register applications is set to No, then only admin users can register apps.
Follow these steps to check if your account is an admin for the Azure AD tenant:
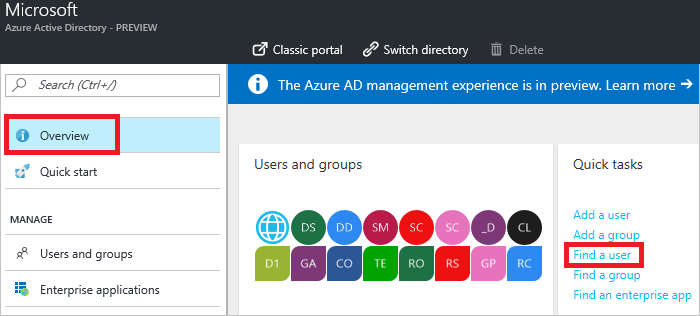
Select Preview window > Overview > Quick tasks > Find a user in the Azure Active Directory - Preview window.
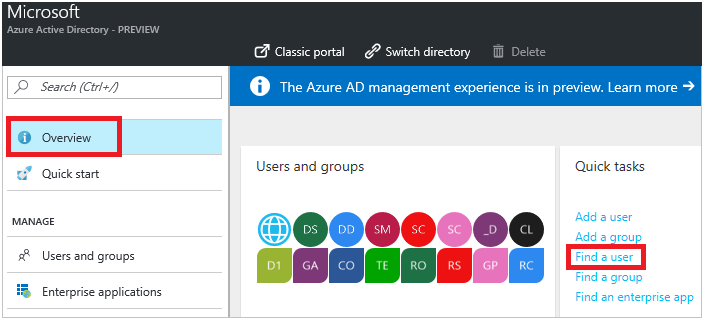
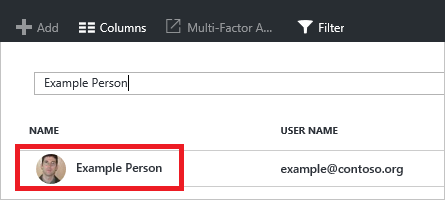
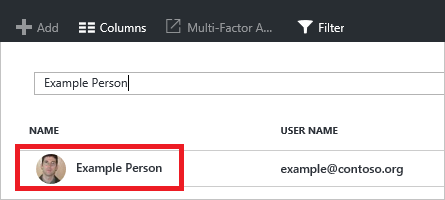
From the list of account, select your account.
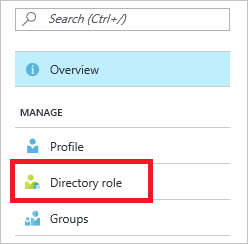
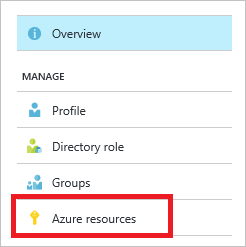
- Select Directory role for your account.
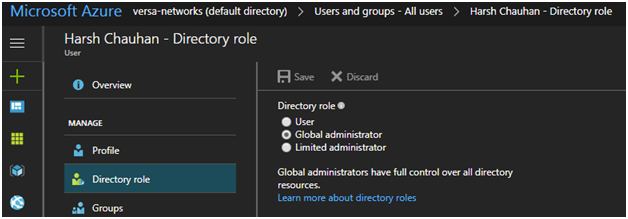
View your assigned directory role in Azure AD. Ask your administrator to either assign you to an administrator role or to enable users to register apps if your account is assigned to the User role ( but the app registration setting from the previous steps is limited to admin users).
Checking Azure Subscription Permissions
In your Azure subscription, your account needs to have Microsoft.Authorization/*/Write access to assign an AD app to a role. This action is granted through the Owner role or User Access Administrator role.
 NOTE: If your account is assigned to the Contributor role, you will not have adequate permission. You will receive an error when attempting to assign the service principal to a role.
Follow these steps to check your subscription permissions:
- Log in to Azure portal.
- Select Azure Active Directory.
- Select Overview > Find a user in Azure Active Directory - PREVIEW.
- Search and select your account from the list of account.
- Select Azure resources.
- View your assigned roles, and determine if you have adequate permissions to assign an AD app to a role. Else, ask your subscription administrator to add you to the User Access Administrator role.
This image shows a user is assigned an Owner role with adequate permissions.

Creating an Azure Active Directory Application
Follow these steps to create an Azure Active Directory application:
- Log in to Azure portal.
- Select Azure Active Directory > App registrations > Add.
- Follow these steps in the Create window:
- Specify a name and URL for the application.
- Select either Web app / API or Native for the type of application you want to create.
- Click Create.
This successfully creates an Azure Active Directory application.
Getting Application ID and Authentication Key
Follow these steps to acquire an ID and authentication key to login:
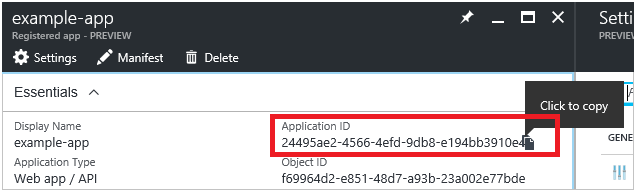
- Select your application from App registrations in Azure Active Directory.
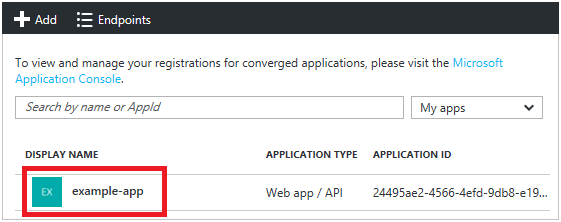
- Copy the Application ID and store it in your application code. The Application ID is referred as the Client ID in Versa Director.
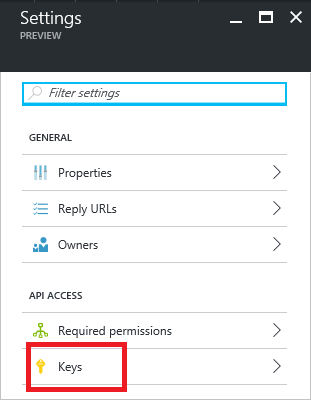
- Select Settings > Keys to generate an authentication key.
- Enter these details in the Keys PREVIEW window: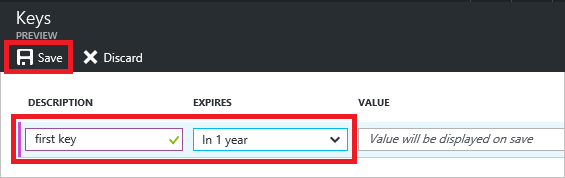
Description Specify a description for the key. Expires Select the duration of this key. Value This value is generated after saving the Key configuration.
NOTE:- Copy this key value as you are not allowed to retrieve the key later.
- Provide the key value with the application ID to log in as the application.
- Store the key value for your application to retrieve it later.
- Click Save to commit the configuration.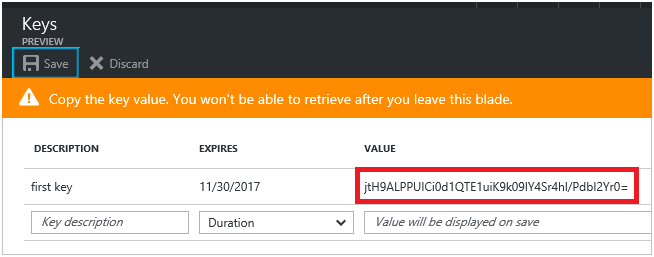
Getting Tenant ID
Provide your Tenant ID and your authentication request to login. Follow these steps to get a tenant Id:
- Select Properties for your Azure AD tenant, in Azure Active Directory.
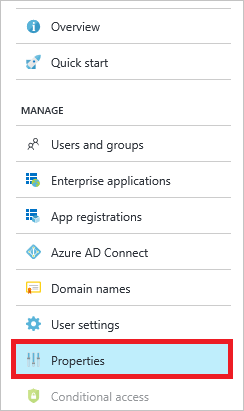
- Copy the Directory ID.
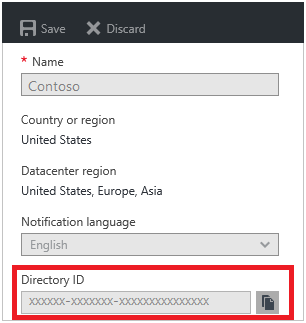
- The Director ID value is your Tenant ID.
Assigning Application to a Role
It is important to assign role with right permission to access the resources in your subscription.
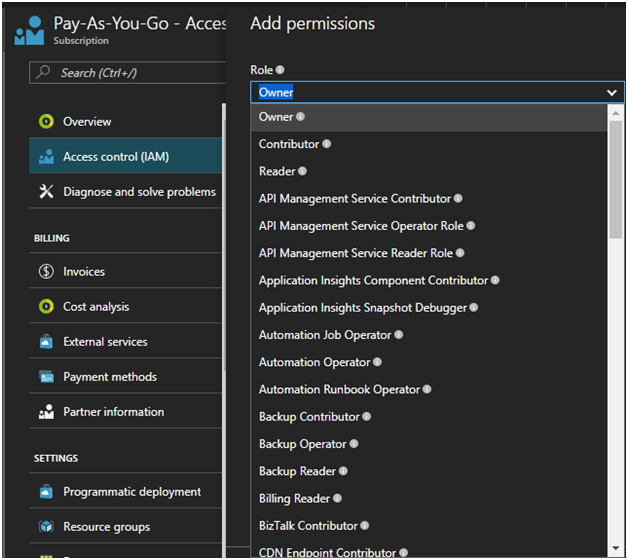
See RBAC: Built in Roles to learn about the available roles.
You can set the scope at the level of the subscription, resource group, or resource. Permissions are inherited to lower levels of scope. For example, adding an application to the Reader role for a resource group implies the application can read the resource group and any resources it contains.
Follow these steps to assign a role at subscription scope:
- Log in to Azure portal.
- Select Subscriptions.
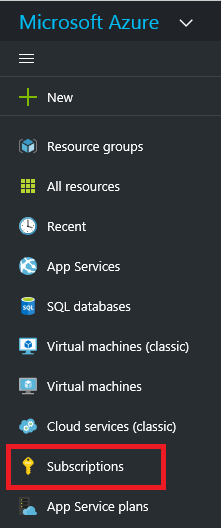
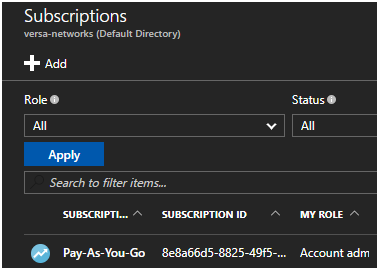
- Select the specific subscription that you want to assign to the application.
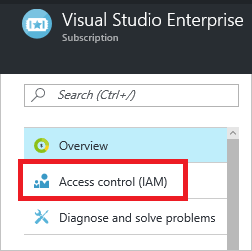
Select Access Control (IAM).
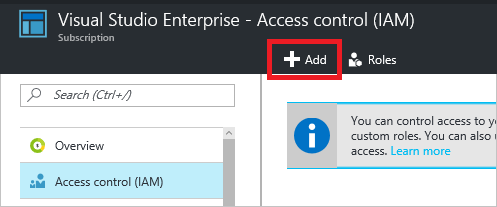
Click Add in the Visual Studio Enterprise - Access Control (IAM) pane.
Select a specific role to the application.
Select your application, and click OK.
Result: Your application is listed in the list of users assigned to a role for that scope.
More Information
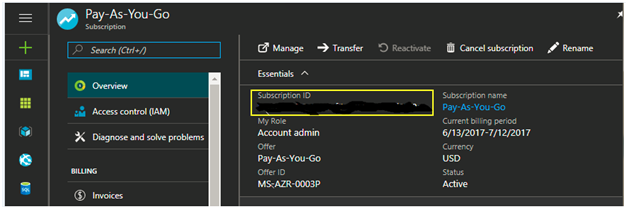
To get Subscription ID, navigate inside subscription option and get the highlighted details.